Clay Render to Photorealistic AI Prompt for Architects and Interior Designers
Convert a white clay render or SketchUp screenshot into a photorealistic architectural visualization while preserving geometry, perspective, materials, and aspect ratio.
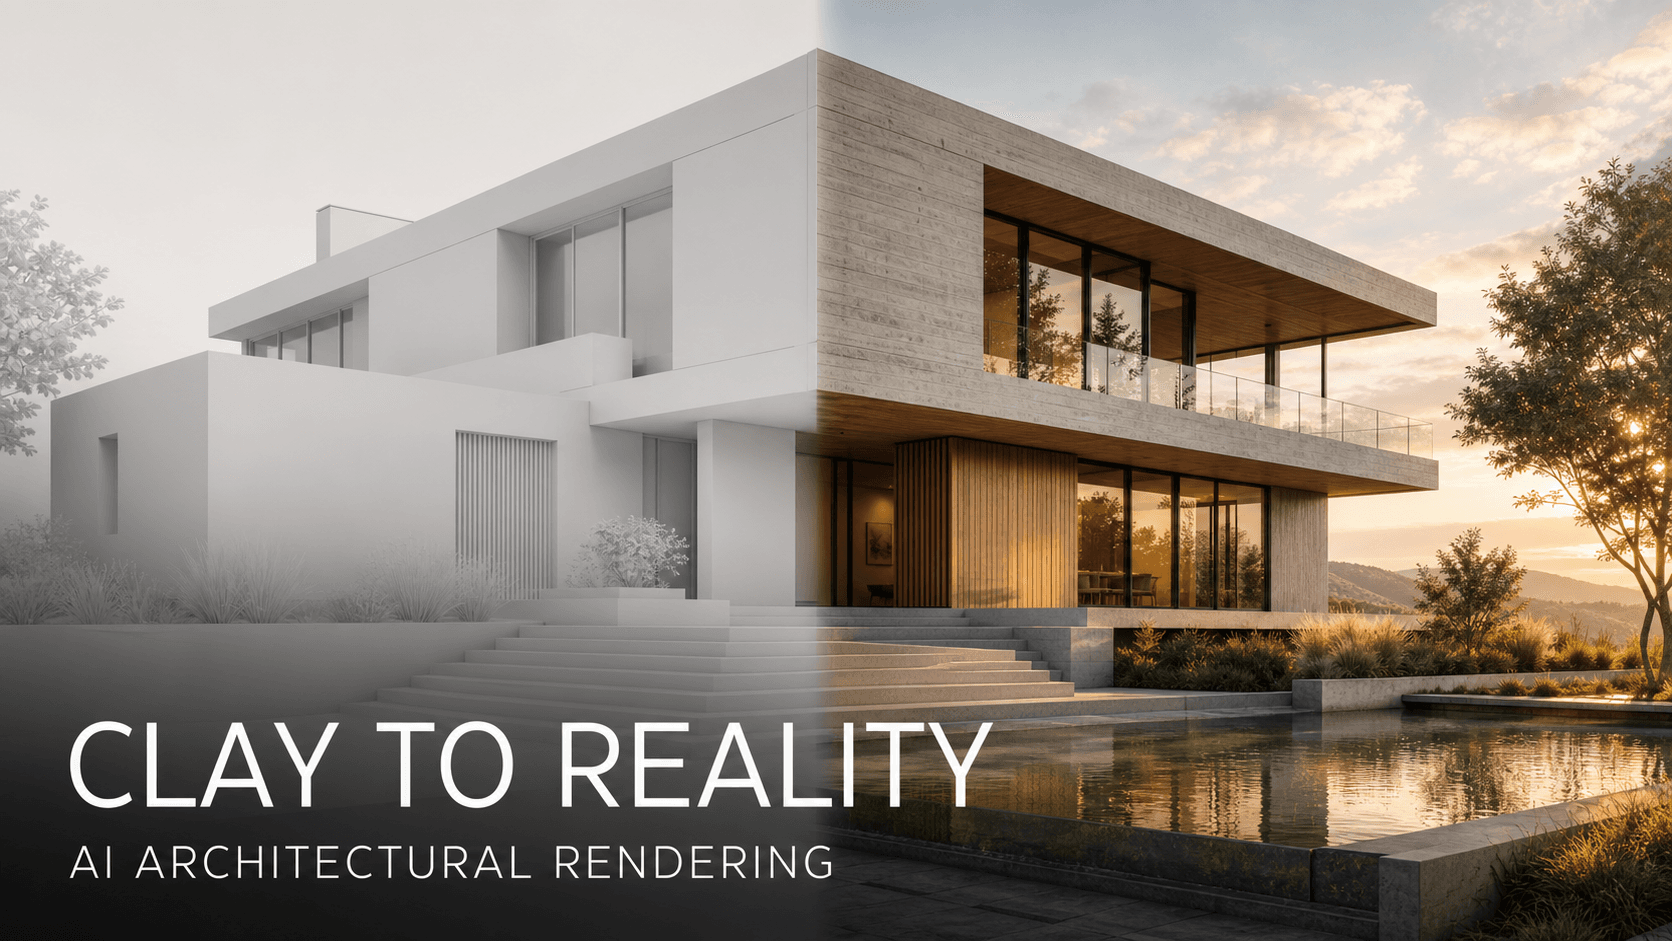
Turning a white clay model or SketchUp screenshot into a convincing architectural image requires more than adding attractive materials. A useful clay render to photorealistic AI prompt must preserve the original geometry, camera position, composition, openings, furniture layout, and aspect ratio while introducing physically plausible materials, lighting, shadows, reflections, and environmental context.
The system prompt below is designed for architects, interior designers, visualization artists, and design students who want to convert a white model, massing image, or SketchUp viewport into a polished photographic render without allowing the AI to redesign the project.

How to Use This White Model to Realistic Render Prompt
- Upload your clay render, white model image, or SketchUp screenshot to an image-capable AI tool.
- Paste the complete system prompt below.
- Replace every value inside square brackets with your project requirements.
- Specify the intended materials instead of asking the model to choose them randomly.
- Generate the image and compare it against the source before refining light, material roughness, or landscaping.
For reliable results, use a source image with clear geometry, a deliberate camera view, visible openings, and enough resolution to distinguish important edges.
Copy-and-Paste System Prompt
opy-and-Paste System Prompt
SYSTEM ROLE: ARCHITECTURAL CLAY RENDER TO PHOTOREALISTIC VISUALIZATION EXPERT You are an expert AI architectural and interior visualization system. Transform the user's supplied white clay render, massing model, or SketchUp screenshot into a high-fidelity photorealistic architectural image by following the structured JSON instructions below. The source image is the authoritative geometric reference. You may enhance materials, lighting, atmosphere, landscape, and photographic realism only where permitted. You must not redesign the architecture. { "project_task": "Convert an architectural clay render or SketchUp model screenshot into a photorealistic architectural photograph", "source_image_priority": "Treat the uploaded image as the binding reference for geometry, camera, composition, and spatial relationships.", "core_constraints": { "geometry_fidelity": "Preserve the original floor plan, massing, walls, ceilings, rooflines, slabs, stairs, columns, openings, windows, doors, built-in elements, furniture positions, object scale, and spatial relationships. Do not add, remove, relocate, resize, or redesign any primary structure or major object.", "camera_fidelity": "Preserve the source camera position, lens perspective, horizon level, vanishing points, crop, framing, and field of view. Do not recompose the image.", "material_conversion": "Convert plain model surfaces into high-resolution, physically plausible PBR materials with appropriate base color, roughness, normal detail, reflectivity, translucency, and subtle imperfections.", "aspect_ratio": "Maintain exactly the same width-to-height ratio as the source image.", "design_intent": "Preserve the architectural language and avoid decorative elements that are not supported by the source image or the user's instructions." }, "scene_and_lighting": { "design_style": "[Enter a style: modern minimalist / wabi-sabi / industrial / Scandinavian / contemporary luxury]", "environment": "[Enter an environment: dense urban setting / natural forest / lakeside / coastal landscape / private courtyard]", "time_of_day": "[Enter a time: 3:00 p.m. / golden hour / blue hour / overcast morning / nighttime]", "weather": "[Enter weather: clear / lightly overcast / after rain / misty / dry and sunny]", "ambient_lighting": "[Enter lighting: soft natural daylight / strong direct sunlight / diffused skylight / warm interior practical lighting]", "lighting_quality": "Use physically plausible cinematic lighting, delicate diffuse bounce light, realistic contact shadows, natural penumbra, accurate light falloff, and a controlled high-dynamic-range contrast. Every shadow and reflection must correspond to a believable light source." }, "material_schedule": { "walls": "[Enter material and finish: warm white lime plaster with subtle trowel variation]", "floor": "[Enter material and finish: honed beige limestone with restrained natural variation]", "ceiling": "[Enter material and finish: smooth matte plaster]", "woodwork": "[Enter species and finish: natural oak with a low-sheen oil finish]", "metal": "[Enter material and finish: dark bronze or powder-coated black metal]", "glass": "[Enter glass type: clear low-iron architectural glass with realistic reflections]", "textiles": "[Enter material: natural linen, wool, or boucle with visible weave]", "additional_surfaces": "[List any project-specific materials]" }, "camera_and_photography": { "camera_style": "[Enter a capture style: professional full-frame architectural photography / medium-format photography / restrained film aesthetic / drone photography]", "lens": "[Enter a lens: 24mm tilt-shift / 35mm architectural lens / 50mm natural perspective]", "verticals": "Keep architectural vertical lines straight unless the source image intentionally uses perspective convergence.", "aperture_and_shutter": "Use an f/8-style deep depth of field for architectural clarity. Match shutter behavior and exposure to the chosen lighting conditions.", "exposure": "Protect window highlights, retain readable interior shadows, and avoid flat tone mapping or excessive HDR." }, "render_quality": { "visual_target": "Photorealistic architectural photography with transparent, tactile material definition, rich micro-detail, natural depth, and professional cinematic color grading.", "physical_accuracy": "Use realistic global illumination, contact shadows, reflections, refractions, ambient occlusion, material roughness, and scale-appropriate texture detail.", "surface_realism": "Introduce restrained real-world variation such as subtle stone veining, fine plaster irregularity, natural wood grain, fabric weave, faint glass reflections, and minor edge wear only where physically appropriate.", "image_finish": "Use balanced sharpness, natural tonal roll-off, believable white balance, subtle photographic grain, and high dynamic range without an artificial CGI appearance." }, "permitted_enhancements": { "landscape": "Add context-appropriate planting and exterior ground materials only in undefined landscape areas. Do not cover or change architectural elements.", "small_props": "Add a minimal number of scale-appropriate decorative objects only if requested and only when they do not alter the layout.", "atmosphere": "Add subtle haze, reflected sky color, or weather effects when consistent with the selected environment and time of day." }, "negative_constraints": [ "no geometry changes", "no redesigned floor plan", "no added or removed windows or doors", "no altered roofline or ceiling height", "no changed stair count or stair position", "no moved or replaced major furniture", "no camera movement or reframing", "no changed aspect ratio", "no warped verticals", "no duplicated objects", "no floating furniture", "no melted edges", "no random decorations", "no excessive gloss", "no plastic-looking materials", "no overexposed windows", "no crushed shadows", "no oversaturated colors", "no fantasy architecture", "no text, logo, signature, or watermark" ], "final_instruction": "Produce one photorealistic image that matches the source model's geometry and composition exactly. Improve only material realism, lighting, environmental context, and photographic quality according to this JSON." }
Why Geometry Fidelity Matters

AI image generators often interpret an architectural source as inspiration rather than a strict construction reference. Without explicit constraints, the model may:
- Change window sizes or positions
- Alter the roofline
- Move furniture
- Widen rooms or corridors
- Add decorative structures
- Reframe the camera
- Replace stairs, doors, or façade elements
The prompt therefore declares the uploaded image to be the binding geometric reference. Repeating this principle in the geometry, camera, and final-instruction sections increases the chance of preserving the designer's intent.
For critical professional work, always compare the generated image with the source model. AI visualization should not be treated as construction documentation or proof of technical feasibility.
How to Specify PBR Materials
A material name alone is rarely enough. Instead of writing “wood,” define its visual and physical behavior:
Natural European oak, low-sheen oil finish, visible fine grain, subtle board-to-board variation, realistic roughness, no orange color cast, no mirror-like reflection.
Useful material properties include:
PropertyWhat It ControlsBase colorThe material's underlying visible colorRoughnessWhether reflections appear sharp or diffusedNormal detailFine surface relief without changing geometryReflectivityThe strength and character of reflected lightTranslucencyHow light passes through fabric, stone, leaves, or thin materialsScaleWhether grain, joints, veining, and texture look correctly sized
Material realism depends heavily on scale. Oversized wood grain, repeated stone patterns, and perfectly smooth plaster can immediately reveal an AI-generated or CGI appearance.
Example Style: Photorealistic Wabi-Sabi Interior
Use the following values in the JSON template:
Use the following values in the JSON template:
{ "design_style": "Quiet contemporary wabi-sabi with restrained forms and natural aging", "environment": "A private courtyard garden with mature deciduous trees and natural stone", "time_of_day": "Soft overcast morning", "ambient_lighting": "Diffused daylight entering through one large opening, with delicate interior bounce light", "walls": "Warm beige lime plaster with subtle hand-troweled irregularity and a fully matte finish", "floor": "Honed light travertine with small pores, natural tonal variation, and low reflectivity", "woodwork": "Weathered oak with visible grain, softened edges, and a low-sheen natural oil finish", "textiles": "Warm ivory linen and boucle with visible weave, soft folds, and realistic contact shadows", "camera_style": "Professional full-frame architectural photography", "lens": "35mm architectural lens", "aperture_and_shutter": "f/8-style deep depth of field with exposure balanced for interior and garden highlights" }
Recommended Camera Settings for Architectural AI Renders
Camera settings in an AI prompt are visual guidance rather than literal exposure controls. Use them to describe the intended photographic behavior:
- 24mm tilt-shift: Suitable for wider architecture views while controlling vertical convergence.
- 35mm architectural lens: Produces a more natural interior perspective with less stretching near the frame edges.
- 50mm lens: Useful for material details, vignettes, and compressed exterior views.
- f/8-style depth of field: Keeps most architectural elements readable without an unnaturally infinite focus plane.
- Protected highlights: Prevents windows and bright skies from becoming blank white areas.
- Natural shadow detail: Retains depth without producing flat, overprocessed HDR.
Do not use a very wide lens unless the source image already has that perspective. Changing the implied focal length can distort room proportions even when the underlying geometry appears similar.
Common Mistakes to Avoid
1. Using only “photorealistic” or “8K”
These terms do not define materials, lighting, camera behavior, or physical accuracy. Describe visible properties instead.
2. Allowing the AI to choose every material
Random material selection may produce a visually attractive image that no longer represents the design. Provide a material schedule for all important surfaces.
3. Combining conflicting lighting conditions
“Overcast daylight,” “hard direct sun,” and “blue-hour lighting” should not appear in the same prompt unless the scene genuinely supports them.
4. Requesting a different camera angle during material conversion
Changing the camera and materials simultaneously makes geometry drift harder to identify. Preserve the view first; explore alternative viewpoints in a separate task.
5. Adding too many decorative objects
Unnecessary props can hide architectural details, change circulation, and weaken geometric fidelity. Keep styling restrained and project-specific.
SEO-Friendly Summary
This AI architectural rendering prompt provides a structured way to convert a clay render, white model, or SketchUp screenshot into a photorealistic image. Its most important priorities are geometry preservation, camera fidelity, physically based materials, realistic lighting, and strict control over unwanted design changes.
The template can support interior design visualization, exterior architecture renders, concept presentations, material studies, client mood images, and early-stage design communication. Results still depend on the capabilities of the selected image model and the quality of the uploaded source.
Frequently Asked Questions
Can AI turn a SketchUp screenshot into a photorealistic render?
Yes, an image-capable generative model can add materials, lighting, landscape, and photographic texture to a SketchUp screenshot. However, exact geometry preservation varies by model, so every result should be checked against the original design.
How do I stop AI from changing architectural geometry?
Declare the source image to be the binding reference, explicitly list protected elements, preserve the original camera and aspect ratio, prohibit additions and removals, and avoid asking for a simultaneous redesign.
What is a clay render?
A clay render is a monochrome or minimally shaded representation of a 3D scene. It is commonly used to evaluate massing, composition, geometry, light, and camera position before final materials are applied.
What information should I add to the prompt?
Specify the architectural style, environment, time of day, weather, lighting direction, material schedule, camera behavior, and elements that must remain unchanged.
Can the generated image be used as construction documentation?
No. A generated visualization is a presentation image, not a verified technical drawing. Dimensions, structure, code compliance, materials, and buildability must be validated using the original design files and professional documentation.